Step One: Star that folder!
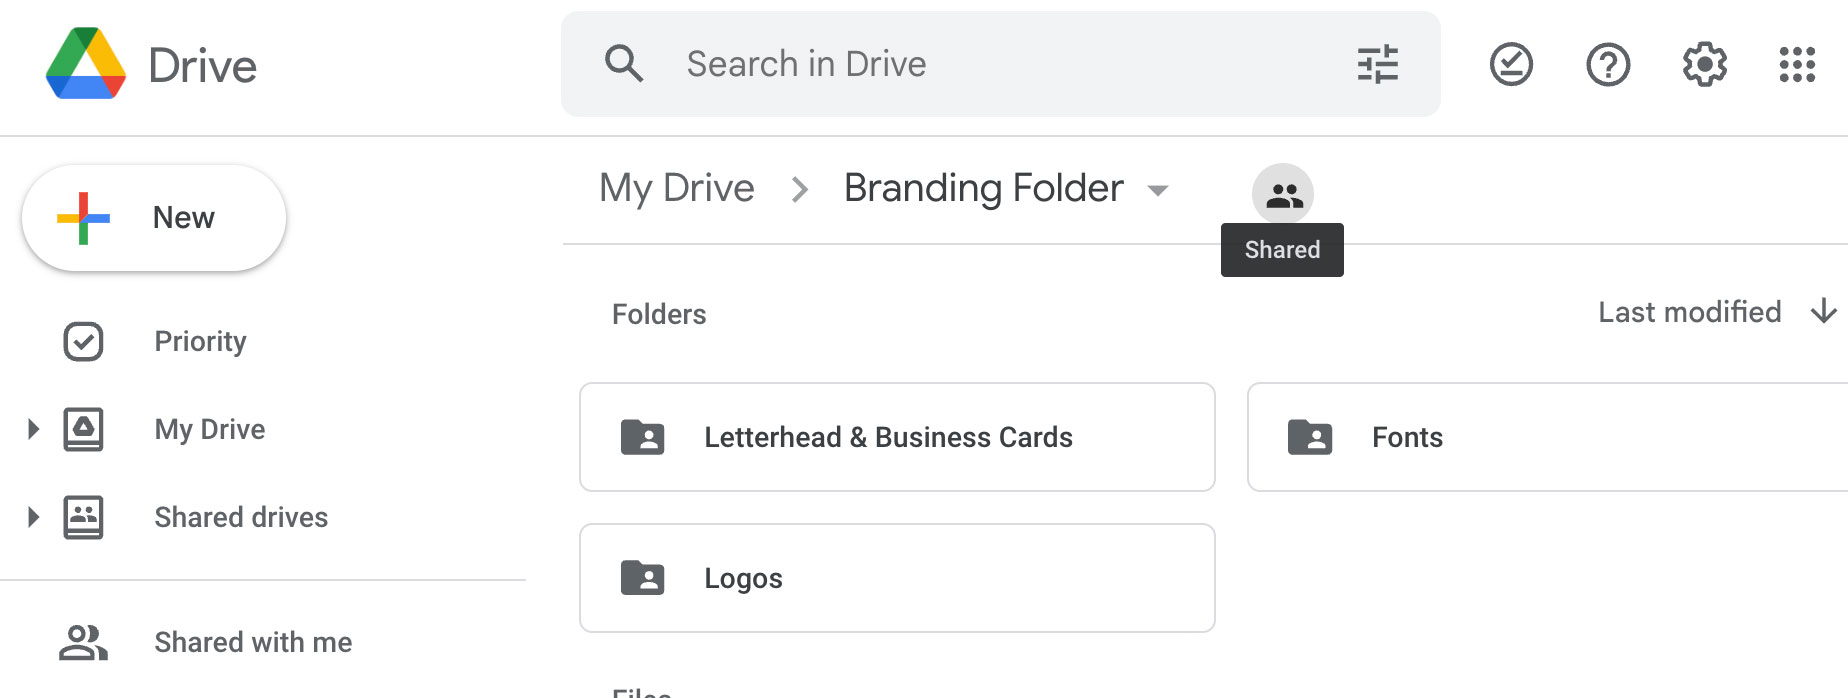
Finding files in Google Drive can be tricky when they are shared by someone else. When we share a branding folder with our clients, the first thing we recommend is for the client to star the folder after they receive the link.
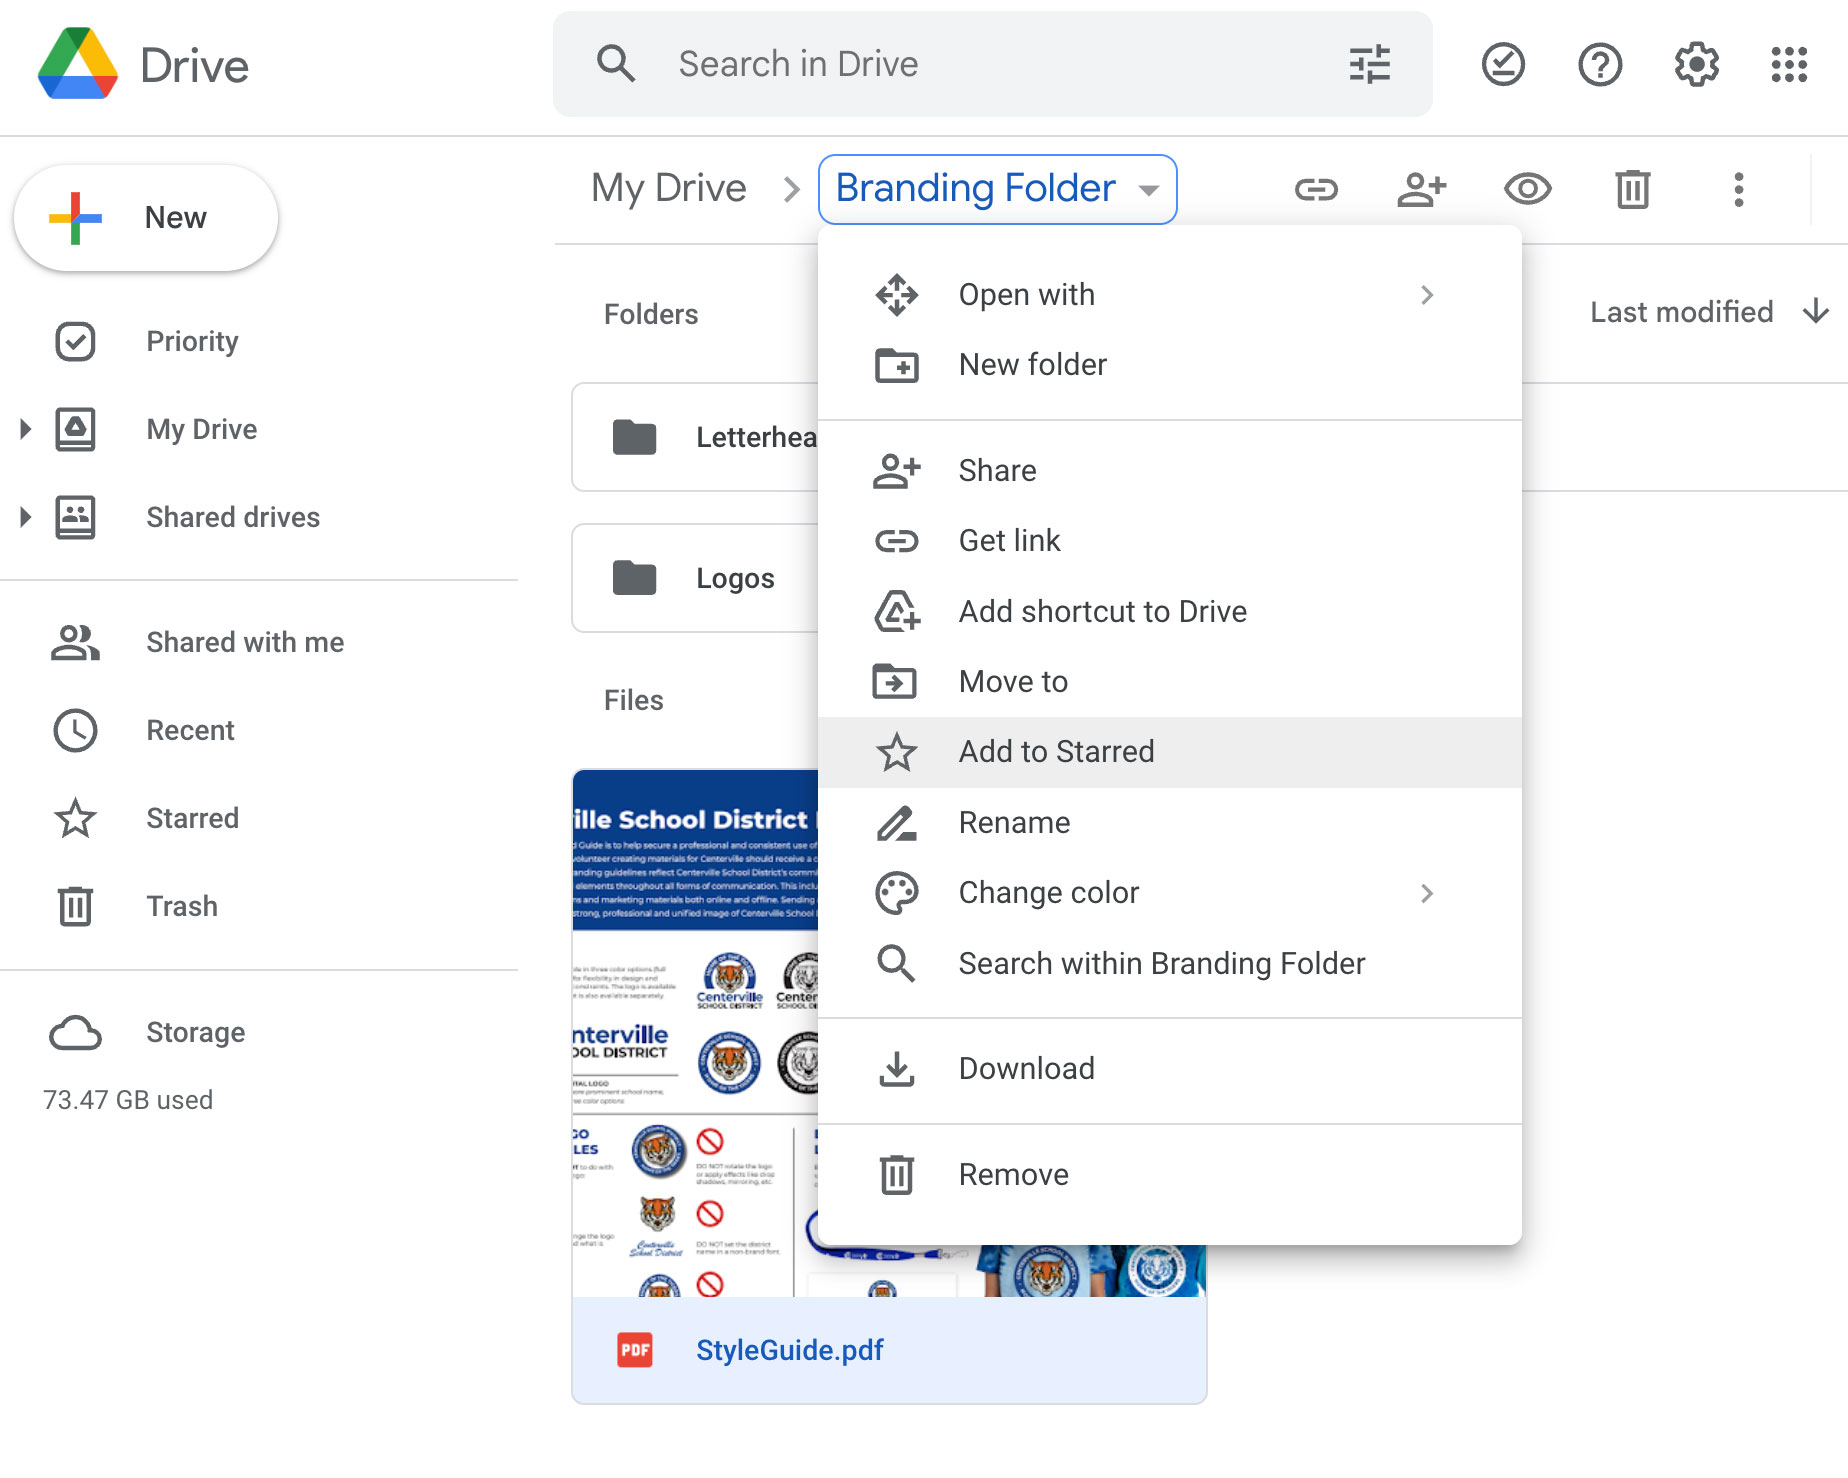
Simply click on the down arrow next to the folder name and click “Add to Starred”.
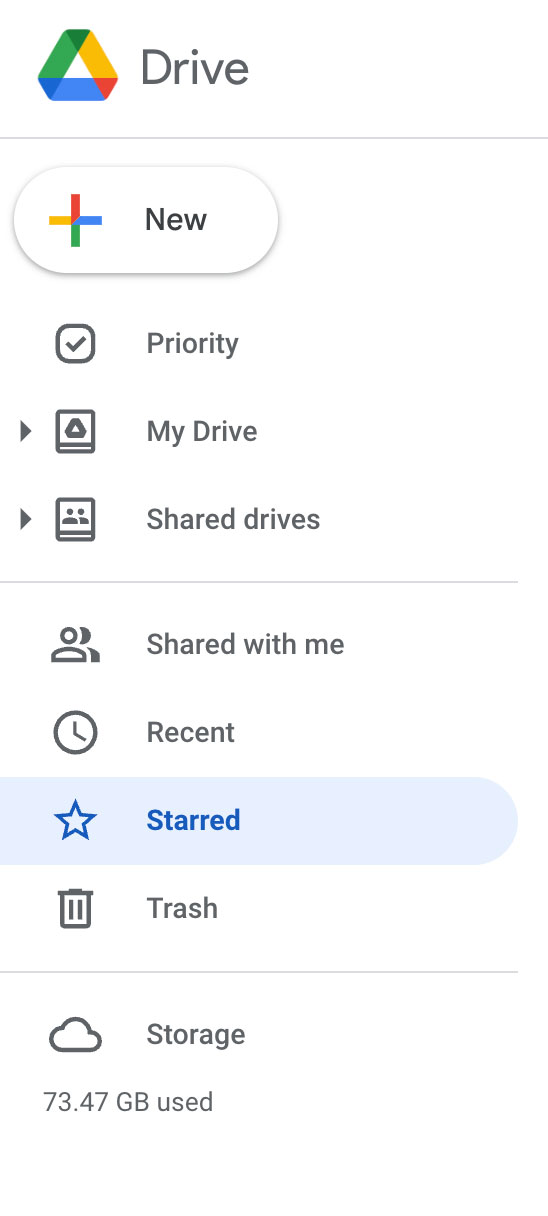
Starring a folder is like setting a bookmark—it’s for folders that you’ll need to access again and again. This prevents the shared folder from being lost in your vast “Shared with me” section. (If your “Shared with me” section looks anything like mine, it’s like peering into the depths of Mary Poppins’ magic carpet bag!)
Step Two: Sharing the folder
Now that you’ve starred the folder for yourself to find easily, it’s time to share the folder with staff and contractors who need to use your branding. I would argue that this is all staff who might make materials or presentations that will be shared with parents or community members. There is no purpose to locking down your brand files—they should be shared far and wide. The key here is that people should be able to download and use files from this folder but not be able to modify or add files to the folder. You should also retain control over who can share the files. Only Editors and Owners can share, edit or add files.
Here’s how you share your folder for access-only:
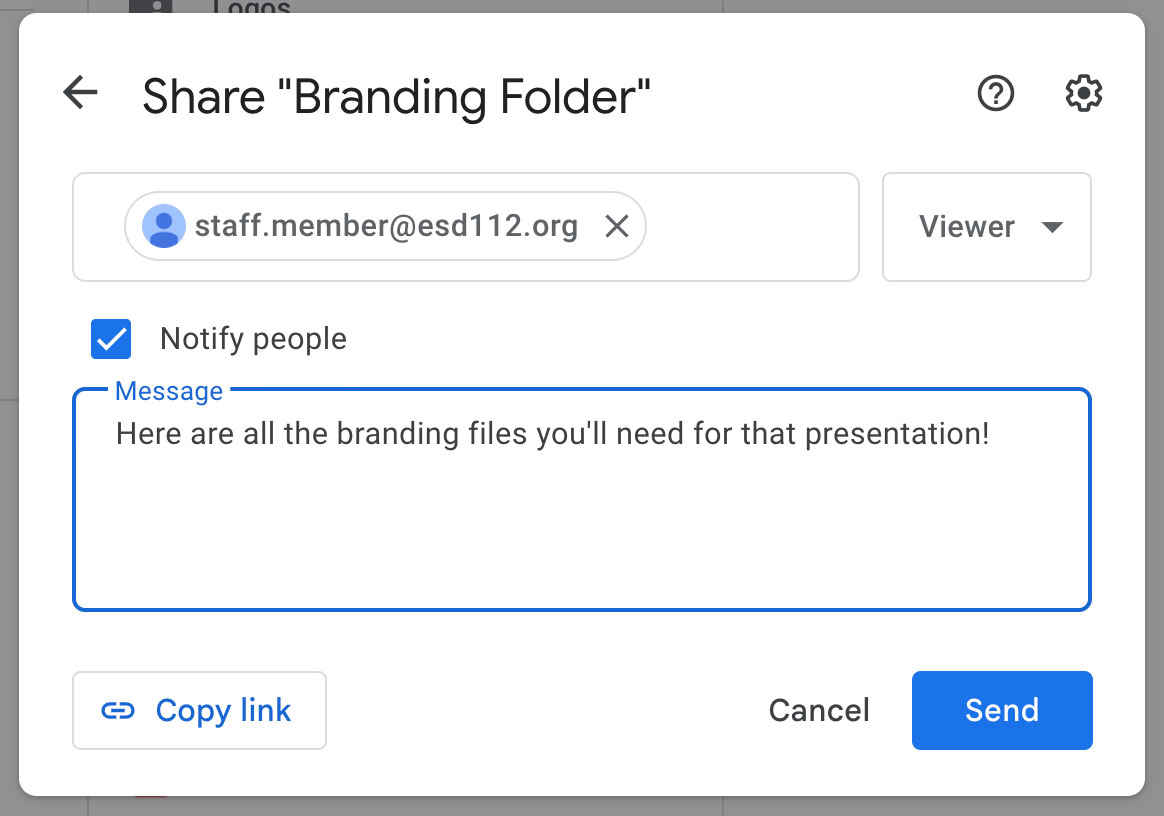
First, click on the folder drop-down and “Share”.
Next, select the General access setting you want (it is Restricted by default).
The three choices are:
- Restricted – only people you add by name can access (when logged in)
- Organization – only people within your organization can access (when logged in)
- Anyone with the link – pretty much what it sounds like (no login required)
The choice you make here is completely up to you and your comfort level. I generally choose “Anyone with the link” to make sharing easier, so that I’m not constantly having to field access requests. However, if you have fonts that you’ve purchased, or if you’re concerned about bad actors mis-using your logos, you might want to select one of the other two options.
Now that you’ve selected the General access setting, you can start inviting people to access the folder by typing in their names and emails. Be sure to select “Viewer” next to the email address, otherwise they will have Editor access (the default).
You’ll have the option to send them an email notifying them of their access during this step.
Did you accidentally add someone as an Editor who should only be a Viewer, or need to give someone Editor access? You can easily edit the sharing settings. You’ll notice that now there is an icon next to your folder name that shows people.
Simply click there, and you’ll get the sharing settings window where you can see who the folder is shared with and at what access level.
And that’s it for sharing! Anything within your brand folder is now accessible to your team. Most people are familiar with these sharing steps, as Google Drive has become so ubiquitous, but you might run into some difficulties with your team members knowing how to use these files that you’ve shared. That leads us to…
Step Three: Team Training
This is the step that we get called in to train teams on the most often. If you’re hearing, “I can see the letterhead, but I can’t type in it,” or “How do I put the logo into my presentation?” you’ll know that you need to direct your team to this post or do a little training. Remember how we made everyone Viewers instead of the default Editors? We did that so that they couldn’t accidentally edit, move, or add to the folder or files. They can see the files, but they can’t touch them at this stage. This is a good thing, but it takes a couple more steps for staff to use the files.
The two sections below explain two ways to use the files. Does your team primarily use Chromebooks and work in Google? Use section one. Do you mainly work from a desktop computer or use Microsoft Office? Use section two. Different team members can decide what works best for them.
1. Copy Files to “My Drive”
Once upon a time in the recent past, it used to be that you could look at a folder or file on Google Drive and click a simple little “Add to My Drive” button. But Google in its great wisdom decided that that made it too easy for people to make copies, or maybe all the copies were filling up their vast servers, so they made it much more difficult and changed that option to “Add Shortcut to My Drive” instead. They’ll probably change it again in 6 months and make this entire post irrelevant. Please let me know when that happens!
But I digress.
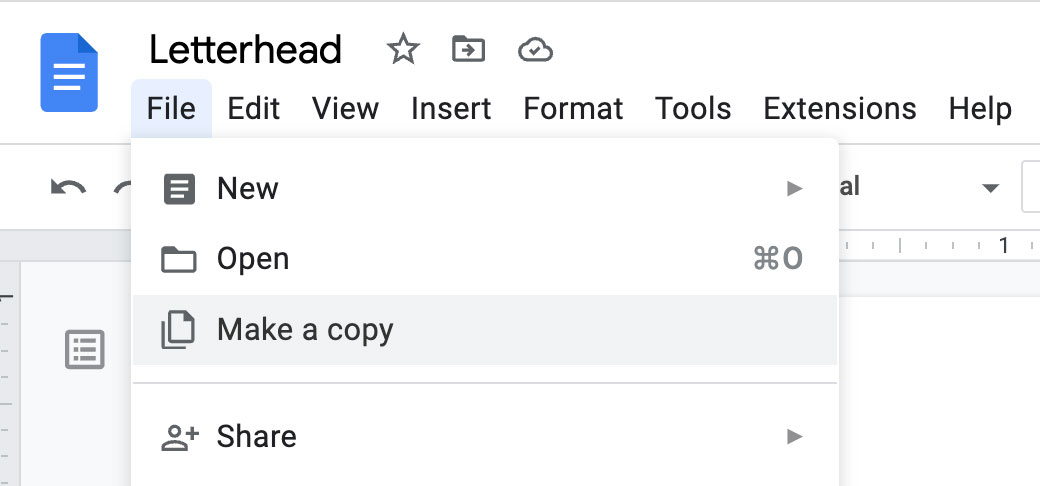
If you want to use a document or presentation file within Google from a branding folder (a letterhead or Slides template, for example), here’s what you do:
- Open the file.
- Click File > Make a Copy
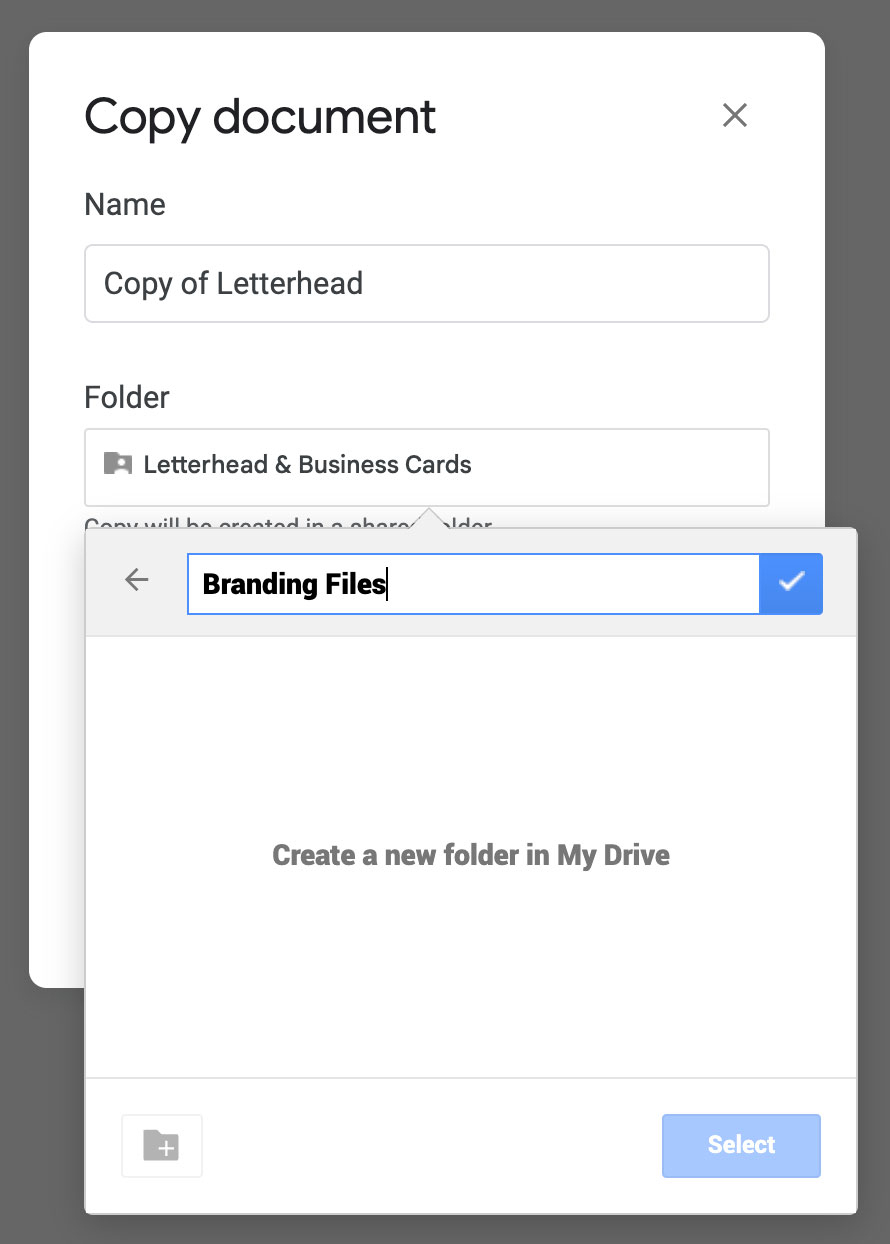
- Click the folder name (location).
- Click the back arrow to go back to your drive (out of the shared folder).
- Create a new folder in your drive to save the file into (for organization’s sake). Name it whatever makes sense for your filing system (you have one, right?).
- Save it.
Now the file is a copy in your Drive, and you can edit to your heart’s content (please consult the style guide!).
2. Download
If you want to use the files on your desktop computer or in Microsoft software, your process is much easier! Simply click the down arrow by the folder name and select “Download”.
The entire folder will zip into a nice, compressed file and go to your Desktop or Downloads folder. Simply find it, double click to unzip, and voila! The files are yours to do with what you will. (Again, please read the style guide!)
Wondering what all the logo files are for, now that you have them? Next up in the series: Logo File Types Explained.
Using brand fonts
A simple style guide might just have a single typeface (font family) chosen, whereas a more complex style guide can include multiple typefaces with different usage cases, as in this Washougal School District style guide.It is important to download and install any...
Decoding color codes
Color types explained In most style guides, colors are provided in CMYK (Cyan, Magenta, Yellow, Black), RGB (Red, Green, Blue), and HEX (Hexadecimal). Some style guides also include PMS (Pantone) colors. Here’s a handy guide to each:CMYK[dsm_icon_list...
Logo file types explained
PNG vs. EPS file types Each of the logos we provide to our clients are available in two file types: EPS (vector) and PNG (raster). Both types can have transparent backgrounds and are widely used. For those unfamiliar with these graphic formats, here is a quick guide...
Introduction to style guides
What is a brand? Before we jump into a discussion of style guides, it’s important to establish some terminology first. When our creative team talks about a “brand,” we are not referring to a logo by itself. A logo is one part of a brand, which, at a minimum, also...

